
So the first thing we’re going to do is set up an IDE.
Why?
An IDE provides a lot: code completion and insight, debugging assistance, syntax highlighting, source control integration, and the ability to tightly couple continuous integration tools and test suites. In teams you also get some standardization(similar tools breed similar outcomes) and a dash of project management.
On balance that seems to be enough to recommend one.
Why Eclipse?
Well Eclipse may be often thought of as the Java IDE, but it’s really more of a tools platform that happens to be used as a Java IDE a lot. It’s a development swiss army knife; if it’s development related there is almost assuredly an eclipse plugin to do it(often several). Being java, it also runs on anything with the resources to run it.
Doesn’t PuppetLabs provide a pre-canned version of exactly this?
They do, I just personally prefer using regular eclipse over a pre-bundled eclipse like PuppetLabs provides. No matter what we’ll need to install plugins later; this is a handy way to introduce doing that.
NOTE: Speaking of, if you want an alternative take, PuppetLabs provides a guide along these general lines as part of the geppetto documentation at http://docs.puppetlabs.com/geppetto/latest/index.html.
Let’s install Eclipse
Eclipse is a java application that comes bundled with everything it needs to run besides java(and it’ll run on just about any Java). You download it, decompress it, and then run the resulting executable. Optionally you can put the resulting eclipse folder somewhere(like Program Files, /opt, Applications, etc.), but this isn’t required.
Having downloaded a compressed file and decompressed it(and perhaps moving it), navigate to where you put it and fire up your shiny new IDE by running the eclipse executable. It’s going to prompt you for a workspace location. The default should be your platform’s equivalent of ~/workspace(So C:\Users\You\workspace for the windows crowd). That’s a reasonable location, so unless you have a different preference just accept it. By default, it’s going to prompt you for this every single time, but there’s a checkbox to not do that.
I’d check it, but that’s me.
After setting up your workspace and waiting while it loads everything you should arrive at a welcome screen:

Congratulations you have installed and set up eclipse!
Let’s install Geppetto
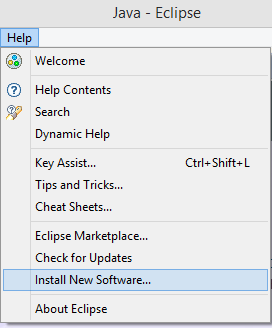
Parts of eclipse aren’t exactly intuitive and to begin with we have a great example of eclipse being almost deliberately obtuse; You install new software / plugins from the Help menu.
Help -> Install New Software to be precise.
Accept that this was a necessary compromise to bloodlessly resolve the great java UI schism of 2003 and just roll with it:
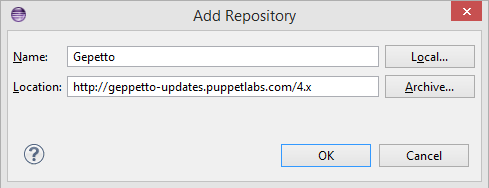
The install new software dialog will pop up. Geppetto is not available from any of the software sites that are included by default, so we need to add a new one before we can install it.
To do this just click add:

Add https://geppetto-updates.puppetlabs.com/4.x as the Location and name it whatever you want(I recommend “Geppetto”):
After hitting OK you should return to the install new software screen and the “work with” field should have defaulted to the site you set up above. If it doesn’t, select it.
After waiting through a small delay as it retrieves a list of the available software go ahead and select git and geppetto for installation:
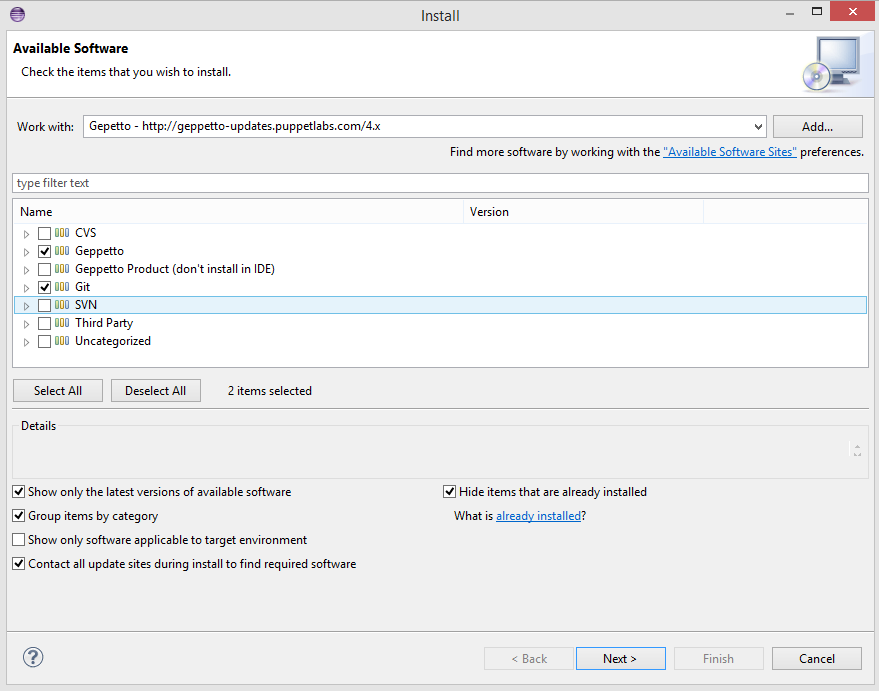
Click next to embark on your standard software installation ride. After a confirmation of your selection and a few nexts you may need to accept a EULA. Go ahead and do that.
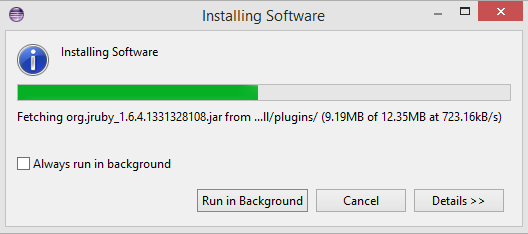
After finishing that up and clicking finish it will actually install the plugin:
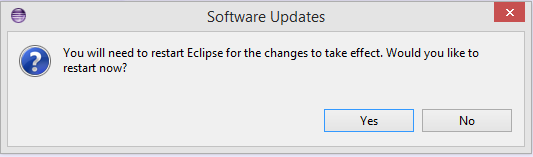
With that done, it will prompt you to restart, go ahead and do that:
And we’re done!
If you’re feeling bold you can install the “Dynamic Languages Toolkit – Ruby” plugin now as well(It’s under <Eclipse Release> Updates -> Programming languages). If not, we’ll go through pieces of this again when we actually need that plugin.
Next up is the next bit of prep, setting up your sandbox.